
How to Style a Dresser Like a Designer
A dresser is usually the largest piece of furniture in a bedroom after the bed, yet it is the one most people leave bare — or bury under clutter. Learning how to style a dresser is not about buying expensive accessories. It is about a few simple design principles: height, layering and balance. Once you know them, you can turn a plain chest of drawers into the most polished corner of your room, using things you probably already own.
This guide covers the formula designers use, seven budget-friendly styling ideas, and the mistakes that make a dresser look messy instead of styled.
Start With a Clean Slate
Before you style anything, empty the top of the dresser completely. Take everything off, wipe the surface down, and look at it with fresh eyes — it is hard to see what works around old clutter.
While it is clear, tighten wobbly knobs and touch up scuffs with a furniture pen. A fresh coat of paint in a soft neutral can transform a second-hand dresser for the price of a small tin — check the current price before buying, as prices vary by brand and shop. Then decide what the dresser is for: a bedroom dresser might hold a mirror, a lamp and a jewellery tray, while a hallway dresser works as a catch-all for keys and post. Knowing its job stops you piling on items that do not belong there.
The Designer’s Formula: Height, Layering and Balance
Designers follow a loose formula that works on almost any flat surface, and a dresser top is no exception.
Anchor With Something Tall
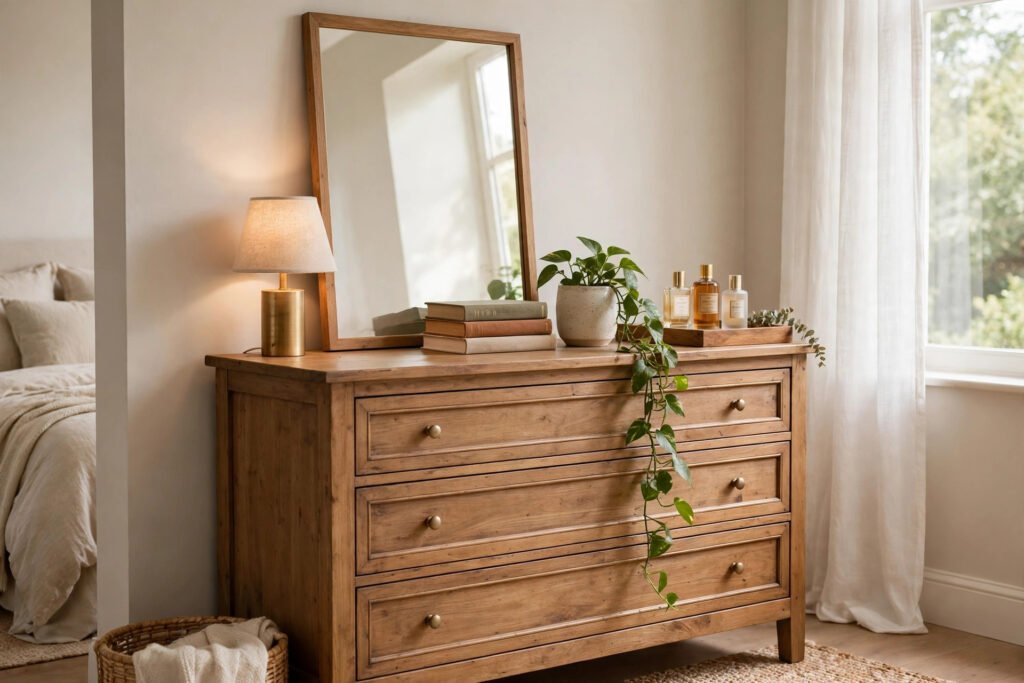
Every well-styled dresser needs one tall anchor — a mirror, a large piece of art, or a tall lamp — to give the eye somewhere to land and stop the surface looking flat. A mirror is the most useful anchor for a bedroom dresser because it doubles as a practical piece. Lean a large mirror against the wall, centred or slightly off-centre. If you prefer art, choose a framed print roughly two-thirds the width of the dresser — anything much smaller will look lost.
Layer in the Middle
Once the anchor is in place, add medium-height items in front of and beside it: a stack of two or three books, a small plant, a candle or a decorative box, with some items sitting slightly in front of others. Layering creates depth, which is what makes a styled surface look interesting rather than lined up like a shop shelf. Keep the middle layer low enough that it does not hide the anchor: nothing in front of a mirror should be taller than a third of the mirror’s height.
Keep the Edges Breathing
Leave some empty space: a dresser top covered edge to edge looks cluttered, no matter how lovely the objects are. Style roughly two-thirds of the surface and leave the rest clear — that empty space is what makes the styled part look deliberate. Group items in odd numbers, since threes and fives look more natural than pairs, and vary heights within each group so the eye moves across the surface.
7 Designer Dresser Styling Ideas That Cost Almost Nothing
Try one of these ideas with things you already have at home.
1. The Classic Mirror and Lamp Pair
Place a tall mirror on one side and a table lamp on the other, with a small tray or a stack of books in the middle. It suits traditional and modern bedrooms alike, and it is the easiest layout to get right.
2. The Book Stack Base
Use a stack of two or three hardback books as a plinth, with a small vase, a candle or a framed photo on top. The books add height and colour, and they cost nothing if you already own them.
3. The Tray Trick
A tray is a designer’s secret weapon. It gathers small items — perfume bottles, a watch, a jewellery dish — into one tidy group, so they read as a single styled arrangement instead of scattered clutter. A wooden tray, a rattan tray or even a large serving plate all work.
4. Greenery for Life
A small plant instantly softens a dresser. A trailing plant in a simple pot, a small succulent or a vase of fresh greenery from the garden adds colour and texture. If real plants are not your thing, a good-quality faux plant works too — just dust it regularly.
5. Art Leaning, Not Hanging
Lean a framed print or a small canvas against the wall behind the dresser, overlapping the mirror slightly. This relaxed, layered look feels collected rather than staged, and it needs no nails in the wall.
6. The Personal Touch
A dresser should feel like yours, not like a showroom. Add one personal item: a framed photograph, a souvenir from a trip, or a favourite scented candle. One is enough — more than that and the surface starts to look like a display shelf.
7. Seasonal Swaps
Change one or two items with the seasons: autumn leaves, a sprig of evergreen in winter, or a bowl of citrus in summer. For more seasonal inspiration, see our budget Christmas decor ideas.
Common Dresser Styling Mistakes to Avoid
These mistakes most often spoil a dresser top:
- Too many small items. Ten tiny objects look like clutter; three larger ones look styled. Gather small pieces on a tray so they read as one group.
- Everything the same height. A row of objects at the same height looks flat. Mix tall, medium and low pieces.
- Blocking the mirror. Never place a tall item directly in front of a mirror — it defeats the purpose and looks accidental.
- Ignoring the wall above. A bare wall above a dresser makes the arrangement feel unfinished. A mirror, art or a simple wall shelf completes the look.
- Styling only the top. Fresh knobs, a folded throw over one corner, or a rug in front of it all help the piece feel finished.
If your bedroom needs a wider refresh, our budget bedroom makeover ideas under $100 show how small changes add up. The same principles apply to the matching nightstand — see how to style a nightstand like a designer.
Styling a Dresser in Different Rooms
The same formula works everywhere, but the details change by room. In a bedroom, keep it calm and practical: a mirror, a lamp for soft evening light, and a tray for jewellery. In a hallway, the dresser is a landing zone — a tray for keys, a small bowl for loose change and a mirror for last-minute checks, with most of the surface left clear. In a living room, it can act as a sideboard: books, a vase of stems and a candle, with art above it. Our guide to the best budget wall art for bedrooms has sizing tips that work just as well in a living room.
FAQs
What should I put on top of a dresser?
Start with one tall anchor — a mirror, large art or a lamp — then add two or three medium items such as books, a plant or a candle, grouped on a tray. Leave about a third of the surface empty.
How do I style a dresser without spending money?
Shop your own home first. Use books you already own as plinths, move a mirror from another room, cut greenery from the garden, and gather small items onto a tray or plate. Rearranging what you have is free.
Should a mirror sit above or on a dresser?
Both work. Hanging a mirror above the dresser saves surface space and suits small rooms, while leaning one on top looks more relaxed and is renter-friendly because it needs no fixings.
How many items should be on a dresser?
Aim for one tall anchor plus two or three groups of smaller items, covering about two-thirds of the surface. If you can count more than seven objects at a glance, you probably have too many.
How do I style a small dresser?
Scale everything down: a smaller mirror or one piece of art, a single small plant, and one group of two or three items on a tray. Let the wall above do the heavy lifting with a mirror or art.
Final Thoughts
Learning how to style a dresser comes down to three habits: anchor with something tall, layer medium pieces in front of it, and leave breathing room. You do not need a designer’s budget — you need a clear surface, a few things you already own, and the confidence to remove anything that does not earn its place.
Start today: clear the top, lean up a mirror, add a tray with three favourite things, and step back.