
These DIY paper wall art ideas prove that a blank wall does not need an expensive print to look finished. Paper is one of the cheapest craft materials there is — a pack of coloured card, a pair of scissors and some glue can fill a whole wall for less than one framed poster. The five projects below are beginner-friendly, take an evening or less, and cost roughly $5–$20 each in materials.
What Paper and Tools to Use
Not all paper behaves the same way, so pick the right kind for the project. Standard printer paper is fine for flat cut-outs, but too thin for anything that needs to hold a shape. Coloured cardstock (around 160–220 gsm) is the workhorse: stiff enough to stand up, easy to cut, and cheap in big packs. Tissue paper suits soft, layered flowers, while crepe paper gives petals a natural curve. For anything that will hang unframed, use acid-free paper if you can — it resists yellowing in sunlight far better than cheap coloured paper.
The basic toolkit is small: sharp scissors, a craft knife and cutting mat, a ruler, a pencil, double-sided tape and a glue stick. A hot glue gun is worth having for anything three-dimensional, because it holds heavy layers fast. Keep a spare sheet of cardboard as a backing board, and buy a few cheap frames from a pound shop or thrift store — a frame instantly makes paper art look intentional rather than improvised. Our guide to budget-friendly gallery wall ideas shows how to arrange framed pieces into a wall that looks planned, not random.
1. Layered Paper Flowers
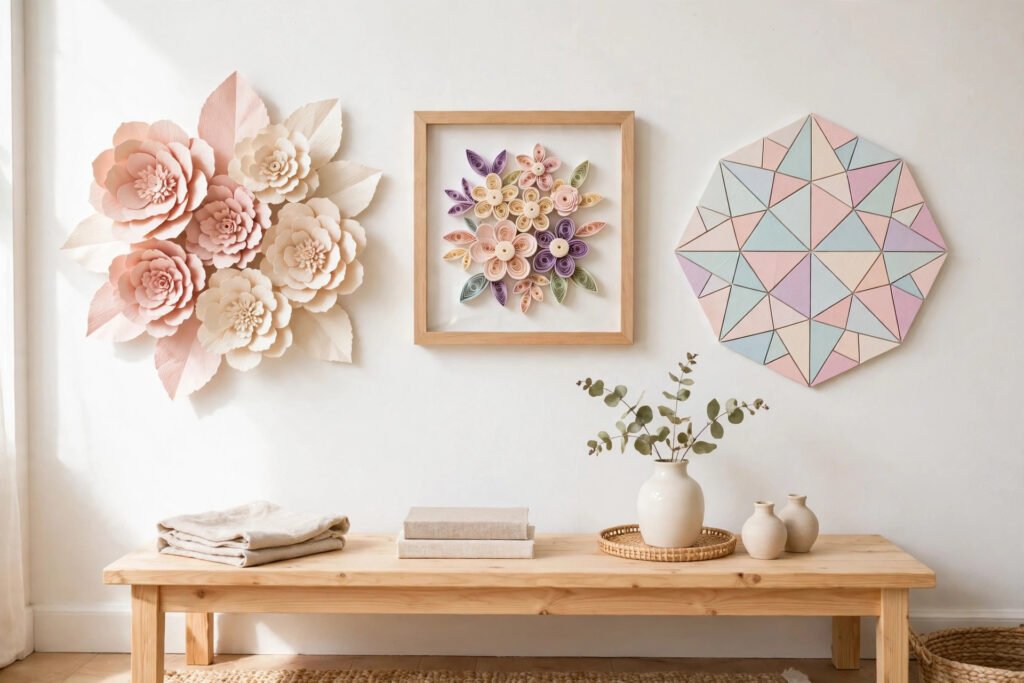
Layered paper flowers are the classic paper wall art project, and they look far more expensive than they cost. Cut petal shapes in three sizes from coloured cardstock, curl the edges gently around a pencil, then glue the layers together from largest to smallest, finishing with a small rolled centre. A single large flower, about 25–30 centimetres across, makes a statement above a bed or sofa; a cluster of five or six smaller ones fills a hallway wall.
Vary the colours within one family — blush, rose and deep pink, for example — and the arrangement looks designed rather than thrown together. Attach the finished flowers to a foam board or directly to the wall with removable mounting strips, so you can rearrange them without damaging the paint. One pack of cardstock, roughly $5–$8, makes a whole cluster, and the project takes about an hour once you have cut the first few petals.
2. Quilled Paper Art
Quilling is the art of rolling thin strips of paper into coils and pinching them into shapes — leaves, petals, spirals and teardrops — then gluing them onto a backing board. It looks intricate, but the technique takes about ten minutes to learn: roll a strip around a cocktail stick, let it relax slightly, pinch one end into a teardrop, and glue it down. A simple flower or a leafy branch in a frame is a perfect first project.
Buy a pack of pre-cut quilling strips for roughly $5–$8, or cut your own from coloured card with a ruler and craft knife. White or cream quilling on a dark backing board looks particularly elegant, and the finished piece has a lovely shadow effect that flat prints cannot match. If you want more inspiration before you start, our DIY wall decor ideas on a budget roundup includes quilling alongside other cheap wall projects.
3. Paper Cut-Out Silhouettes
A silhouette is simply a shape cut from a single sheet of paper and mounted on a contrasting background, and it suits almost any room. Botanical leaves, birds, city skylines, mountains and simple geometric shapes all work well. Draw or print your shape, trace it onto coloured card, and cut carefully with a craft knife on a cutting mat — slow, steady cuts give cleaner edges than rushing with scissors.
Mount the cut-out on white or cream card inside a frame, leaving a small gap between the two layers so the silhouette casts a soft shadow. Black on white is the timeless combination, but sage green on cream or navy on pale blue feels softer in a bedroom. A set of three matching silhouettes in a row looks deliberate and costs almost nothing: three thrift-store frames, roughly $3–$5 each, plus a few sheets of card.
4. Framed Origami
Origami turns a single square of paper into a crane, a butterfly, a star or a geometric shape, and a small group of folded pieces in a deep frame looks like a shop-bought art print. Start with simple folds — a classic crane or a five-pointed star — and make three or five in the same colour family. Use proper origami paper if you can; it is thinner than cardstock and creases cleanly, and a pack of 100 sheets costs roughly $5–$8.
Mount the pieces on a backing board inside a box frame, which is deep enough to hold the folds without squashing them. A tiny dot of glue on the back of each piece stops them shifting. Butterflies in a row suit a child’s bedroom, cranes suit a hallway, and monochrome geometric shapes suit a modern living room. If a fold goes wrong, unfold it and start again — the paper is the only cost.
5. Geometric Paper Mosaic
A geometric mosaic is the easiest project on this list and one of the most modern-looking. Cut coloured card into triangles, squares or hexagons, then arrange them into a pattern on a backing board — a gradient from light to dark, a simple chevron, or a random scatter in one colour family. Glue each piece down with a glue stick, leaving a 2–3 millimetre gap between pieces so the backing colour shows through as a grid.
A large square mosaic, about 40 by 40 centimetres, makes a strong focal point above a desk or console table, and it costs roughly $5–$8 in card. Plan the layout before gluing anything: lay the pieces out on the board, step back, and shuffle them until the balance feels right. If you love this look, our roundup of the best budget wall art for bedrooms has more affordable geometric and abstract options to pair with it.
How to Hang Paper Art So It Lasts
Paper art is light, so hanging it is easy — but a few habits keep it looking good for years. Use removable adhesive strips or small picture hooks rather than pins, which leave holes and can tear thin paper. In a rented home, Command-style strips are the safest choice. Keep paper art out of direct sunlight where possible, or choose a frame with UV-filtering glass for a sunny wall. Dust framed pieces with a dry cloth, and never spray cleaner directly onto paper. A light coat of clear matte spray sealant, roughly $5–$8 a can, protects unframed pieces from dust and fading.
Frequently Asked Questions
What is the best paper for DIY wall art?
Cardstock between 160 and 220 gsm is the best all-rounder: stiff enough to hold a shape, easy to cut and cheap in bulk packs. Use tissue or crepe paper for soft flowers, and acid-free paper for anything you want to last more than a year without yellowing.
How much does DIY paper wall art cost?
Most projects cost roughly $5–$20 in materials, including the paper, glue and a cheap frame. Many use paper and tools you already own, so the real cost can be close to zero. Prices are rough ranges — check the current price before buying.
Is paper wall art durable?
Yes, if it is framed or sealed and kept out of direct sunlight and damp rooms. Framed pieces last for years; unframed paper fades faster and can warp in humidity, so avoid bathrooms and sunny windowsills.
Do I need a craft machine for paper wall art?
No. Every project in this guide is cut by hand with scissors or a craft knife. A craft machine speeds up cutting, but it is a luxury, not a requirement — a ruler and a sharp blade do the same job more slowly.
Can I make paper wall art with kids?
Absolutely. Layered flowers, geometric mosaics and paper silhouettes are all safe, simple projects for children over about six, with adult supervision for the craft knife and hot glue gun. Let them choose the colours — the results are usually more creative than the plan.
Final Thoughts
DIY paper wall art ideas are proof that decorating well is about imagination, not money. A pack of card, an evening of cutting and folding, and a few cheap frames can fill a blank wall with something personal that no shop-bought print can match. Start with one project — layered flowers or a geometric mosaic are the easiest first steps — and see how it feels before making a whole set. Once you have one piece up, the next blank wall will not stay blank for long.